Step-by-step guide
How to use
Whetstone
Whetstone is a free Bible app for memorization, reading, listening, and community — no ads, no in-app purchases. This guide walks through every feature, in the order you meet it.
Start here
Start here
1
Install Whetstone on your phone.
Get Whetstone from the App Store or Google Play. You can also install it from the browser: on an iPhone, open whetstonebible.com in Safari, tap Share, then Add to Home Screen. On Android, open it in Chrome and choose Install app. Once it’s installed, it opens without a signal, and any audio you download under Audio → Manage downloads plays offline.
The first time you open each tab, a short tour points out what’s there. It starts with the two buttons at the top right of every screen: Guide (this manual) and Settings, where you set the text size, theme, Bible translation and reminders. (Voices are on the Audio tab.) To see the tours again, go to Settings → About → Show tours again.
Watch: Get started · 0:54 2
Install Whetstone on your computer.
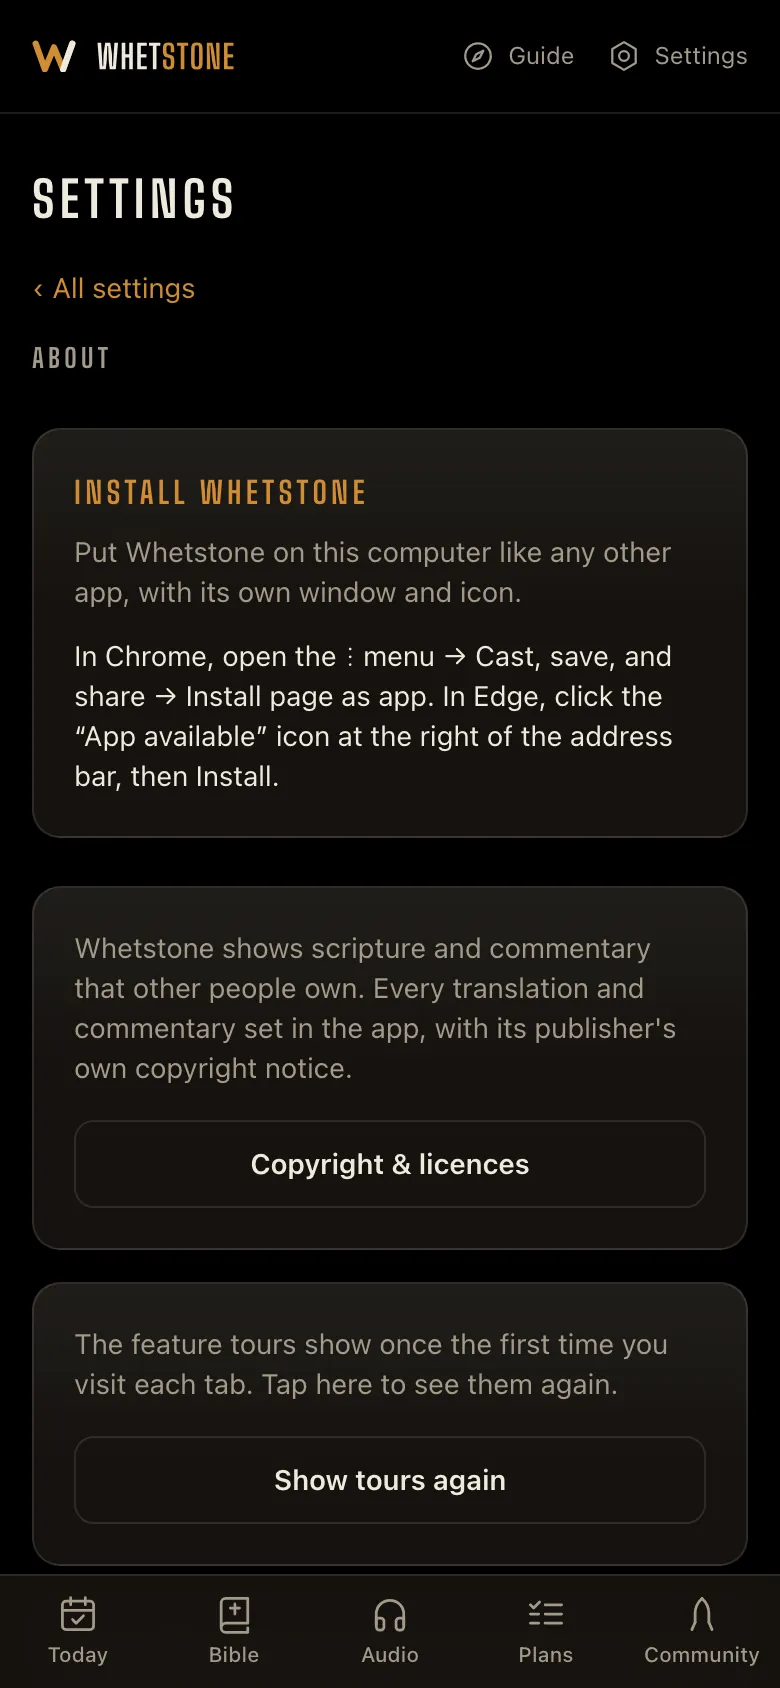
Whetstone installs on a computer like any other app, with its own window and icon. Open whetstonebible.com, then go to Settings → About and use Install Whetstone, or follow your browser’s steps. Chrome: open the ⋮ menu, then Cast, save, and share → Install page as app. Edge: click the App available icon at the right of the address bar, then Install. Safari on a Mac (macOS Sonoma 14 or later): choose File → Add to Dock, then click Add. Firefox 143 or later on Windows: click Add tab to taskbar at the right of the address bar (not in the Microsoft Store edition). Firefox on Mac and Linux can’t install web apps, so use Chrome, Edge or Safari there.
3
Today’s verse.
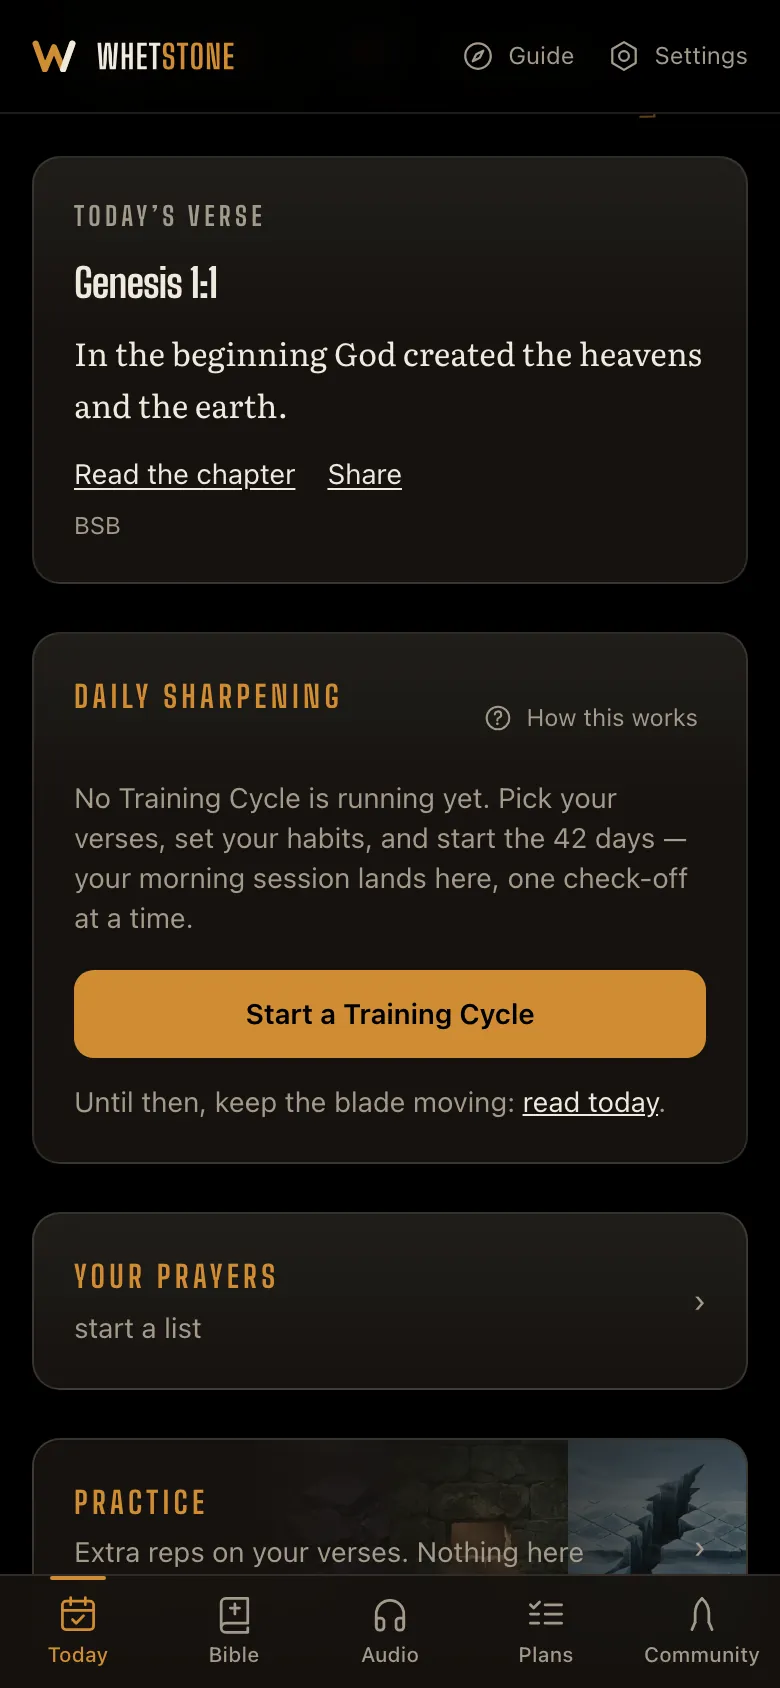
Each day a verse appears on Today. The date decides which one, so everyone sees the same verse on the same day. On a training day it shows just below your Daily Sharpening card. Tap Read the chapter to open the chapter in the Bible, or Share to send the verse.
4
Today’s devotional.
Near the bottom of Today is a reading for the morning and another for the evening. Choose Morning and Evening, by C. H. Spurgeon, or Daily Light on the Daily Path, which is made entirely of Bible verses. Until 4 pm you see the morning reading, then the evening one; tap Morning or Evening to read the other. A long reading shows its first three paragraphs; tap Read all for the rest. Where a reading names a chapter in color, tap it to open the Bible there. Both books are public domain. The devotional needs a connection. Morning and Evening can be listened to as well as read — tap Listen on the card, or Add to listening queue to put it in Your queue on the Audio tab.
Watch: Today's devotional · 0:48 5
Listen to the devotional.
Both devotionals can be heard as well as read: tap Listen on the devotional card; it plays the morning or evening reading you are on. Morning and Evening is read by Frazer Blaxland from Crossway’s free Morning and Evening podcast, which uses Alistair Begg’s updated edition so the wording differs a little from the text. Daily Light is read by a computer-generated voice. Add to listening queue puts either one in Your queue on the Audio tab to play in order with your chapters. It needs a connection.
Watch: Listen to the devotional · 0:32 6
Start your first cycle.
Tap Start a Training Cycle on Today. First choose a track: Memory only (verses to memorize over 42 days), Reading only (a reading plan with no verses; it finishes at Day 42 without a checkpoint), or Memory and reading (both). For a memory cycle, pick your verses from a starter pack, a search, or straight from the Bible: one per slot is the recommended pace, with five slots the target. Each starter pack comes in two parts of five, so one part fills a cycle and the other is ready for your next one. Then add any daily habits, choose a start day, and you’re set for the next six weeks.
Watch: Start a Training Cycle · 0:51 7
The daily session.
Each day, Today shows what to do: your verse work, today’s reading if you’re on a plan, up to five requests from your prayer list, your habits, and anything on your group’s calendar. Verse work starts with first-letter prompts and builds up to saying the verse out loud while the app listens and scores it word by word. If you miss a day, carry on from where you are. Nothing resets.
The reading step works the same way as a plan on the Plans tab. Start today’s reading opens the first chapter. The › arrow at the bottom of the reader marks that chapter read and moves to the next. On the last chapter it changes to ✓ and takes you back to the session with the reading checked off. Listen instead plays the day’s chapters, starting with the first one you haven’t heard, and checks each one off as it plays. The Audio tab shows how many you’ve heard and has a Back to Daily Sharpening button. At the bottom of the Daily Sharpening card, Cycle details opens This cycle, Habit reminders and your Training record.
Every recall activity has a Skip for now button. The note under it tells you what skipping does, and that depends on where you are. In a daily session: “Today still counts. This verse just doesn’t get the rep.” At the Day-28 checkpoint: “Marks this verse untested — no score, and it gets extra reps through the last two weeks.” At Day 42: “Marks this verse untested — no score, and it graduates as still sharpening, not held.” In maintenance: “Nothing changes. It comes back tomorrow.” In a Sword Drill round: “Nothing is recorded. Your best stays as it is.”
Watch: Your daily session · 0:58 8
Reminders.
All reminders are in Settings → Reminders. The Daily reminder sends one notification a day and nothing else. Each habit can have its own reminder, set when you set up a cycle or later from Today. Each reading plan can have a Reading reminder; turn it on from that plan on the Plans tab. Group calendar events can have reminders too, one event at a time. When you sign up for an event, its reminders come automatically; turn off “Events I signed up for” if you’d rather not get them. Reminders need an account so they can reach all your devices.
Tips
Each of these shows once, on the screen it belongs to. They live here for good.
- Tap any verse number to highlight it, keep a note, or see what it means.
- Download a chapter and it keeps playing with no signal at all.
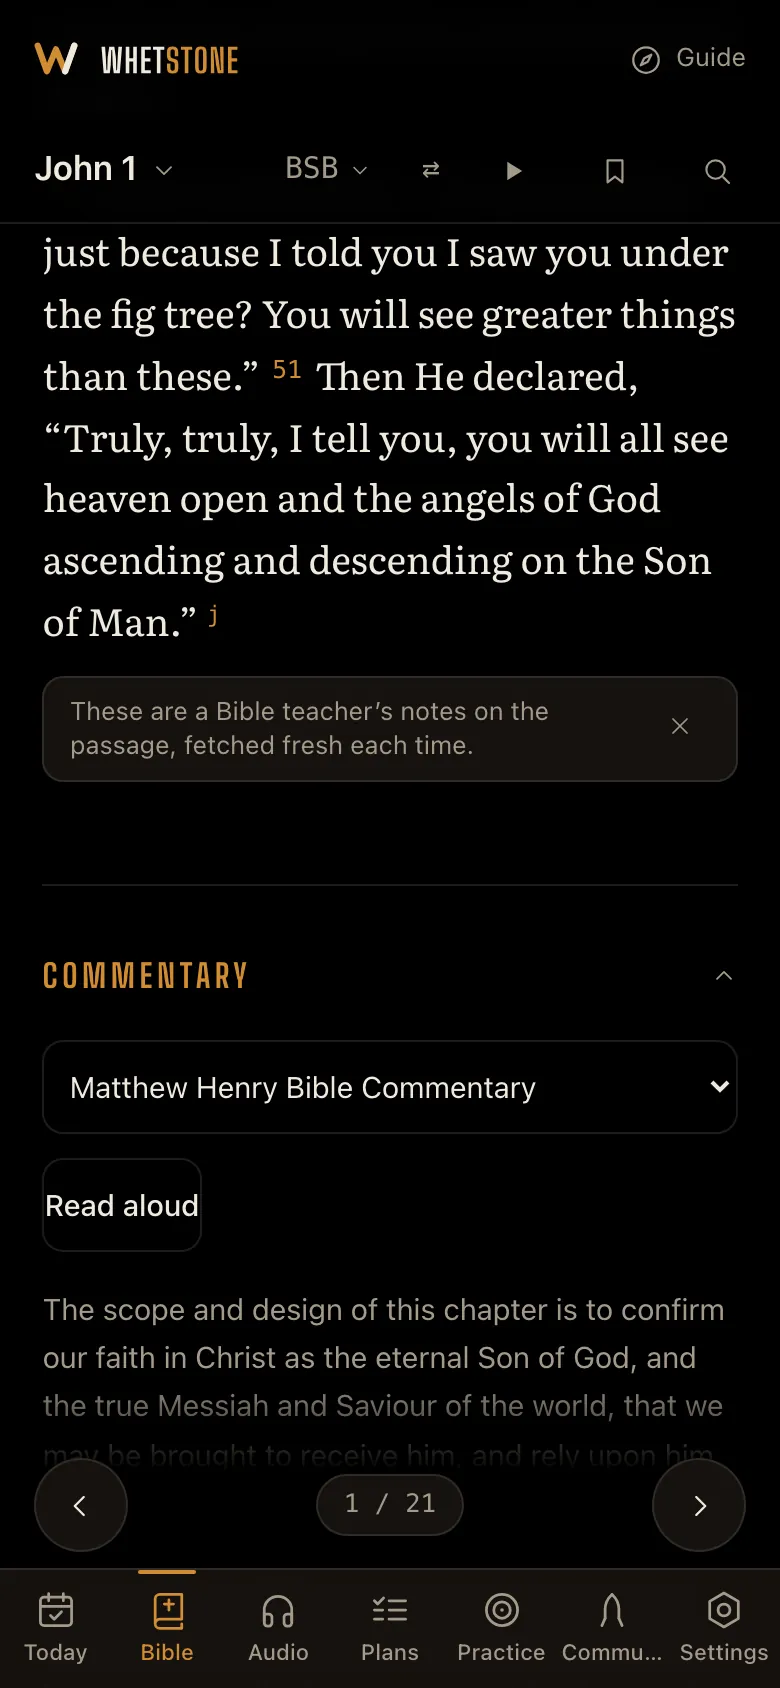
- These are a Bible teacher’s notes on the passage, fetched fresh each time.
- This link opens Enduring Word’s teaching videos in your browser.
Bible & audio
Bible & audio
1
The audio Bible.
The Audio tab reads the Bible out loud. Play in order, loop a chapter, a book or a range you choose, pick Memory Deck to loop the chapters that hold your cycle’s verses, or play Your queue. There’s a sleep timer if you listen at night. You can download chapters or whole books to listen without a signal. While you listen, the next twenty minutes or so download in the background, so a dropped signal doesn’t stop playback. If the connection is gone for longer, the player waits and starts again by itself when it’s back. Recorded audio comes in five translations. The BSB has four readers: Souer, Hays, Gilbert and David. The World English Bible is read by David Williams. The KJV and the Bible in Basic English are read by computer voices, and the Basic English ones come in four accents. The ESV is Crossway’s own recording, read by David Cochran Heath; it streams only, so it needs a connection and can’t be downloaded. For the NIV, NKJV, NLT (for the book of Mark), Geneva Bible and a human-read KJV, the end of each chapter links to free recordings on Bible Gateway’s website. To change the translation or reader, tap Change on the Bible audio card at the top of the Audio tab. The same card is in Settings under Display & audio. The Reading voice card, lower on the Audio tab, sets your phone’s own voice, which reads verse drills and commentary aloud. In the Bible tab, the play button reads the chapter you are on in its own translation when it has audio (BSB, KJV, World English Bible, Bible in Basic English or ESV); for any other translation it plays your Bible audio choice. Changing the voice switches a chapter that is playing right away.
Watch: Listen · 1:06 2
Read the Bible and mark it up.
The Bible tab is a full reader. Tap a verse number to highlight the verse, bookmark it, add a note, add its chapter to your listening queue, or save it to memorize later. To mark just a few words, press and hold one, drag to select the rest, then pick a color. Saved verses show up under Saved for memorization the next time you set up a cycle. The bookmark button in the toolbar lists everything you’ve marked.
Watch: Read and study · 0:57 4
Commentary.
If a verse doesn’t make sense, open the commentary right where you’re reading. It explains the passage verse by verse, and you can switch between eleven: Tyndale’s modern study notes (the default) and ten classic commentaries. David Guzik’s Enduring Word is at the top of the list and opens his notes on that chapter. Just above the commentary, About this book opens Tyndale’s introduction to the whole book, and People, places & events lists who and where the chapter mentions, with Tyndale’s profiles of the main characters, a map of the places, family trees, dates and every verse.
Your default commentary is the one you picked when you first set up the app. Change it any time in Settings → Display & audio. If you switch commentaries in the reader, that becomes your default too, on every device you’re signed in on.
5
Study one verse.
Tap a verse number and choose Commentary for this verse to see only the part that covers it, or Cross references to see the verses most often linked to it and tap one to go there. Greek & Hebrew shows every original word; tap one for its meaning, its grammar and every verse that uses it. In Search, Bible dictionary & topics looks up any name, place or subject in the Tyndale Bible Dictionary and eight classic dictionaries and topical Bibles. Enduring Word’s written commentary is the first row in every commentary list, and under each chapter the Teaching section links to a teaching video for many chapters.
Watch: Study a verse · 0:54 6
People, places and maps.
Below every chapter, tap About and the book’s name for Tyndale’s introduction: its setting, its story and its big themes.
Tap People, places & events for everyone and everywhere in the chapter, with Tyndale’s character profiles first. Tap a person for who they were, their family and every verse they appear in; tap a place for where it is and every verse that mentions it. Places with a known location are on a map of the chapter: tap one.
Watch: People, places and maps · 0:53 7
Translations and voices.
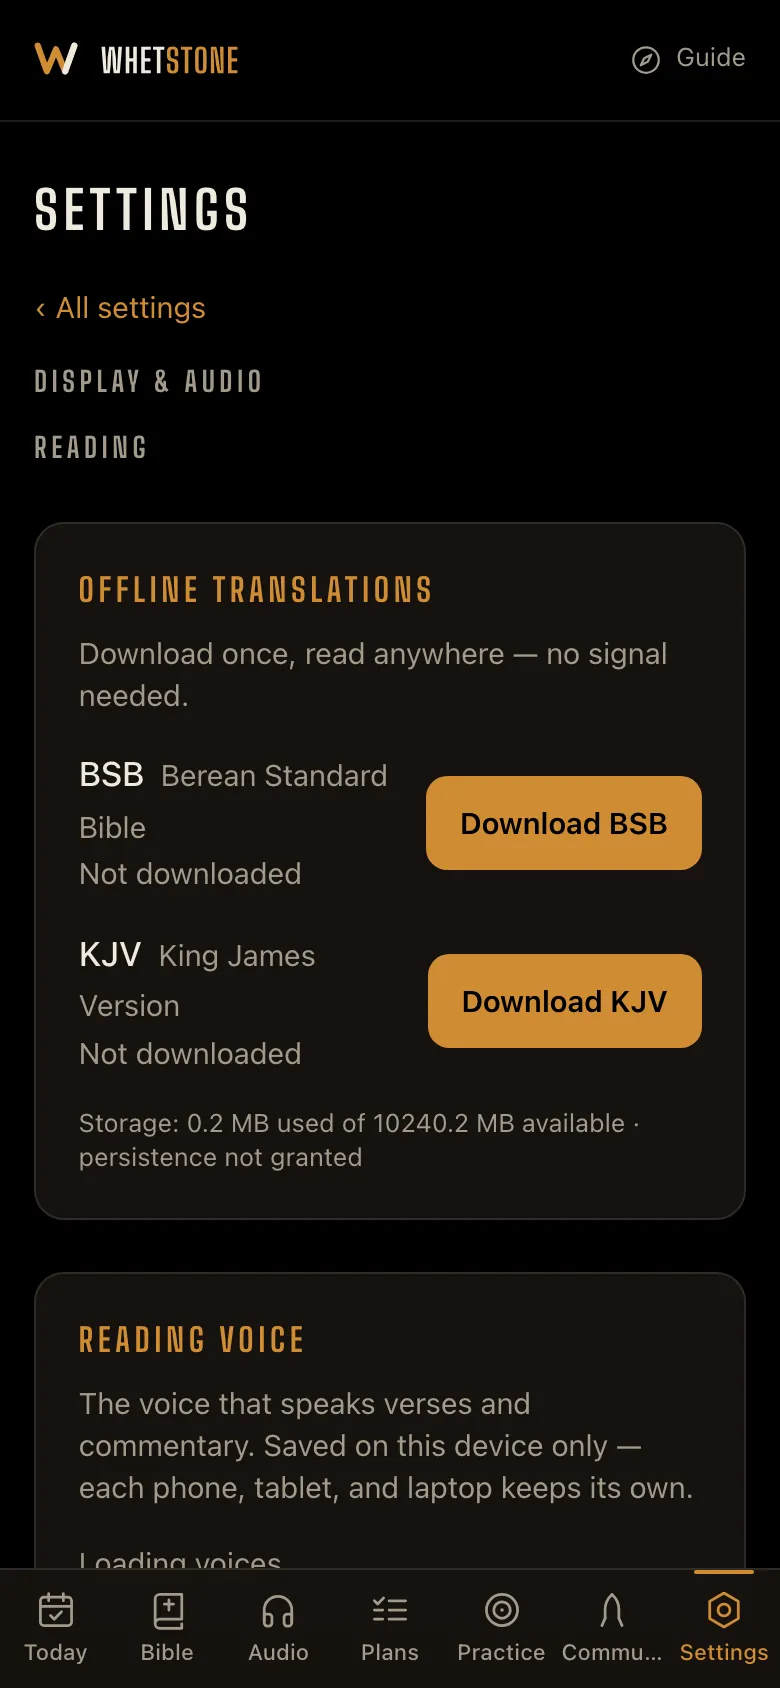
Tap the translation name in the Bible toolbar to switch between fifteen translations. Eleven are public domain and can be downloaded for offline reading: the BSB, KJV, World English Bible, Majority Standard Bible, Berean Literal Bible, Bible in Basic English, American Standard Version, Young’s Literal, Darby, Webster and the Geneva Bible of 1599. Download them in Settings → Display & audio, under Offline translations. The NKJV, NIV, ESV and NLT are licensed, so they need a connection. Both voice choices live on the Audio tab. Bible audio picks the translation and reader for recorded chapters. Reading voice is a voice built into your device, used for verse drills and commentary. On a phone, Automatic uses a Premium or Enhanced English voice when one is installed, otherwise the phone’s default; Get better voices shows where to download one.
8
Download for offline.
On the Audio tab, tap Manage downloads. At the top are four bulk options: Memory deck (the chapters with your cycle’s verses), Old Testament, New Testament and Entire Bible. You can also pick a book and download single chapters. Before a large download starts, the app estimates the space it needs and warns you if it might not fit. Bible text is downloaded separately: in Settings → Display & audio, under Offline translations, download any public-domain translation to read with no signal.
Watch: Download for offline · 0:38
Training
Training
1
Fill the Gap.
Find it in Practice, from the card on Today. You get a verse with one word missing and four words to choose from. Tap the one that belongs. The three wrong choices come from your own verses, so you can’t find the answer just because the others look out of place.
Watch: Practice drills · 0:57 2
Next Line.
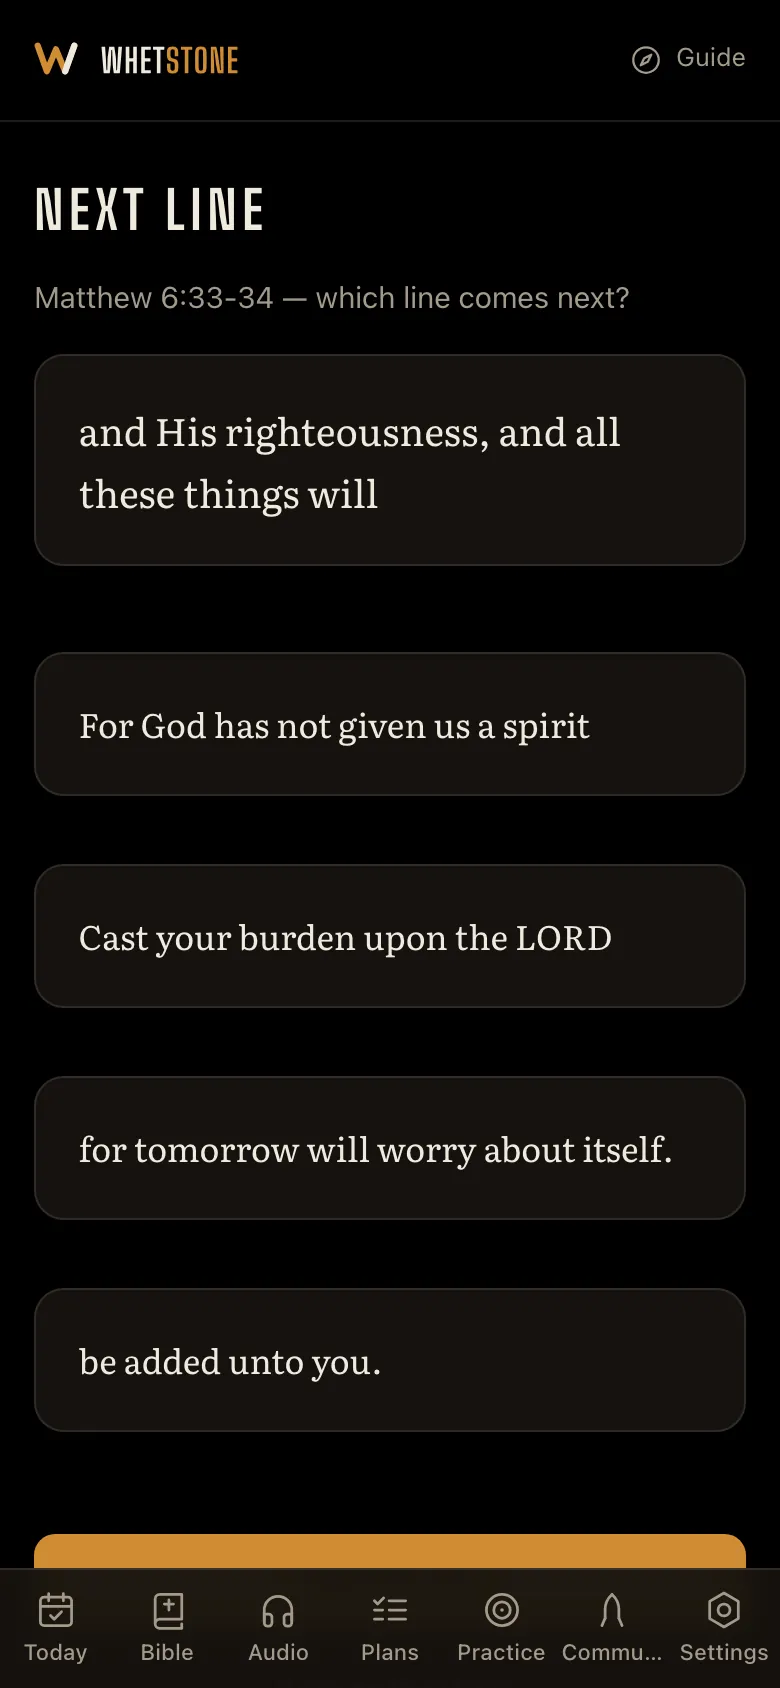
Find it in Practice, from the card on Today. You see one phrase from a verse and four choices for the phrase that comes next. The hardest wrong choices are other phrases from the same verse, so you have to know the order, not just recognize the words.
3
Verse Pairs.
Find it in Practice, from the card on Today. Cards are face down: half are references and half are the opening lines of verses. Turn over two at a time and keep them if they match. There’s no timer and no move count.
It’s the easiest of the drills, and you can clear a board just by remembering where cards are. It’s here because it’s familiar and quick, and it puts each reference next to its verse over and over.
4
Reference Match.
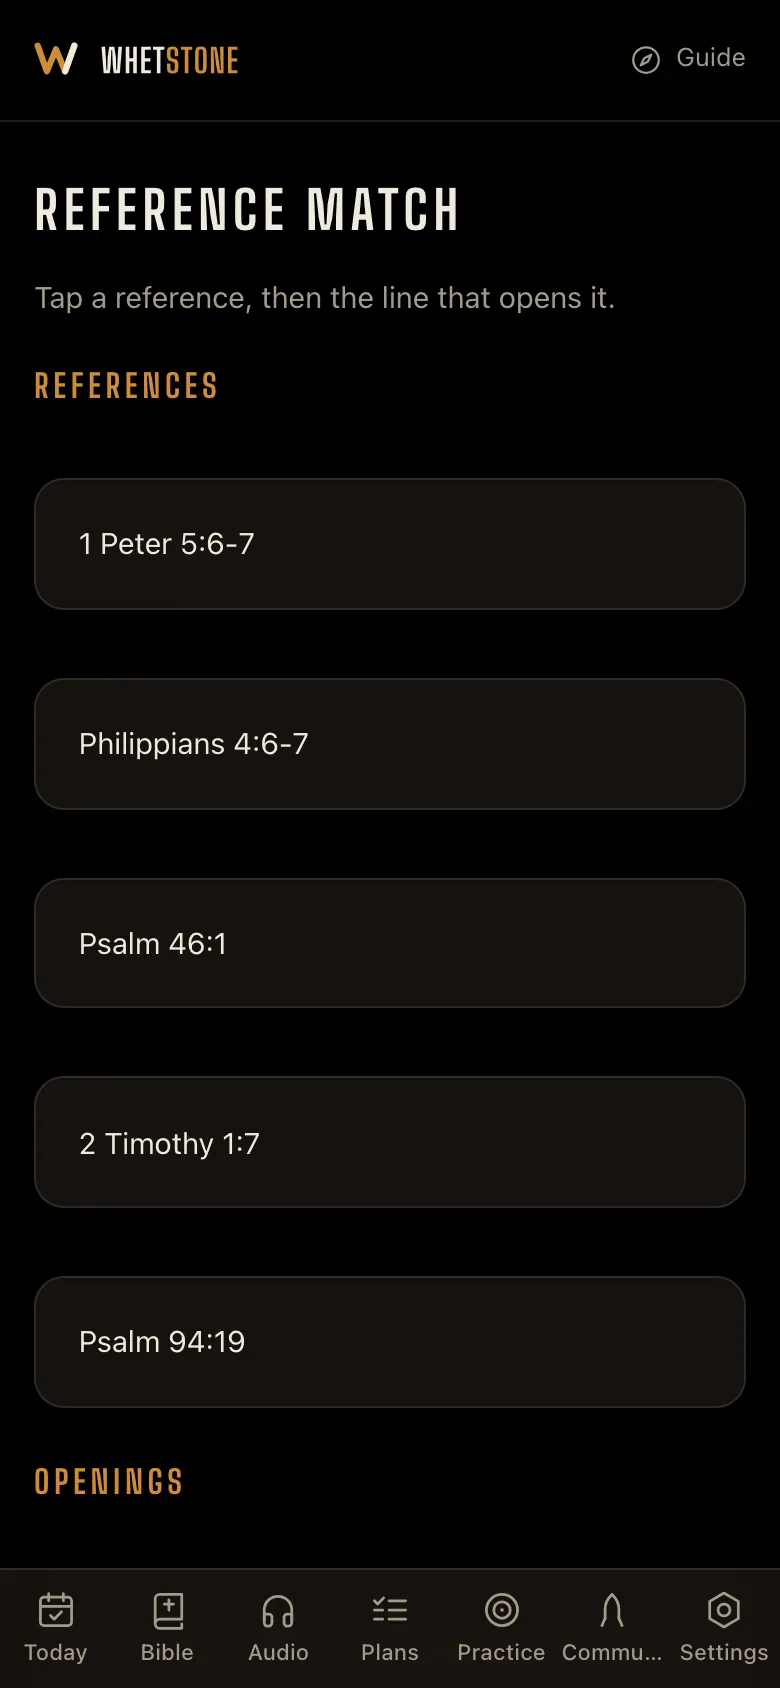
Find it in Practice, from the card on Today. References are listed down one side and opening lines down the other, in a different order. Tap a reference, then tap the line it belongs to. A wrong match just clears so you can try again.
This drill works the other way round from the rest. Everywhere else you get the reference and recall the words. Here you work out which verse a reference points to, with similar verses on screen. It helps with the “I know the verse but I could never find it” problem. Like Scramble, it isn’t scored.
5
Verse Scramble.
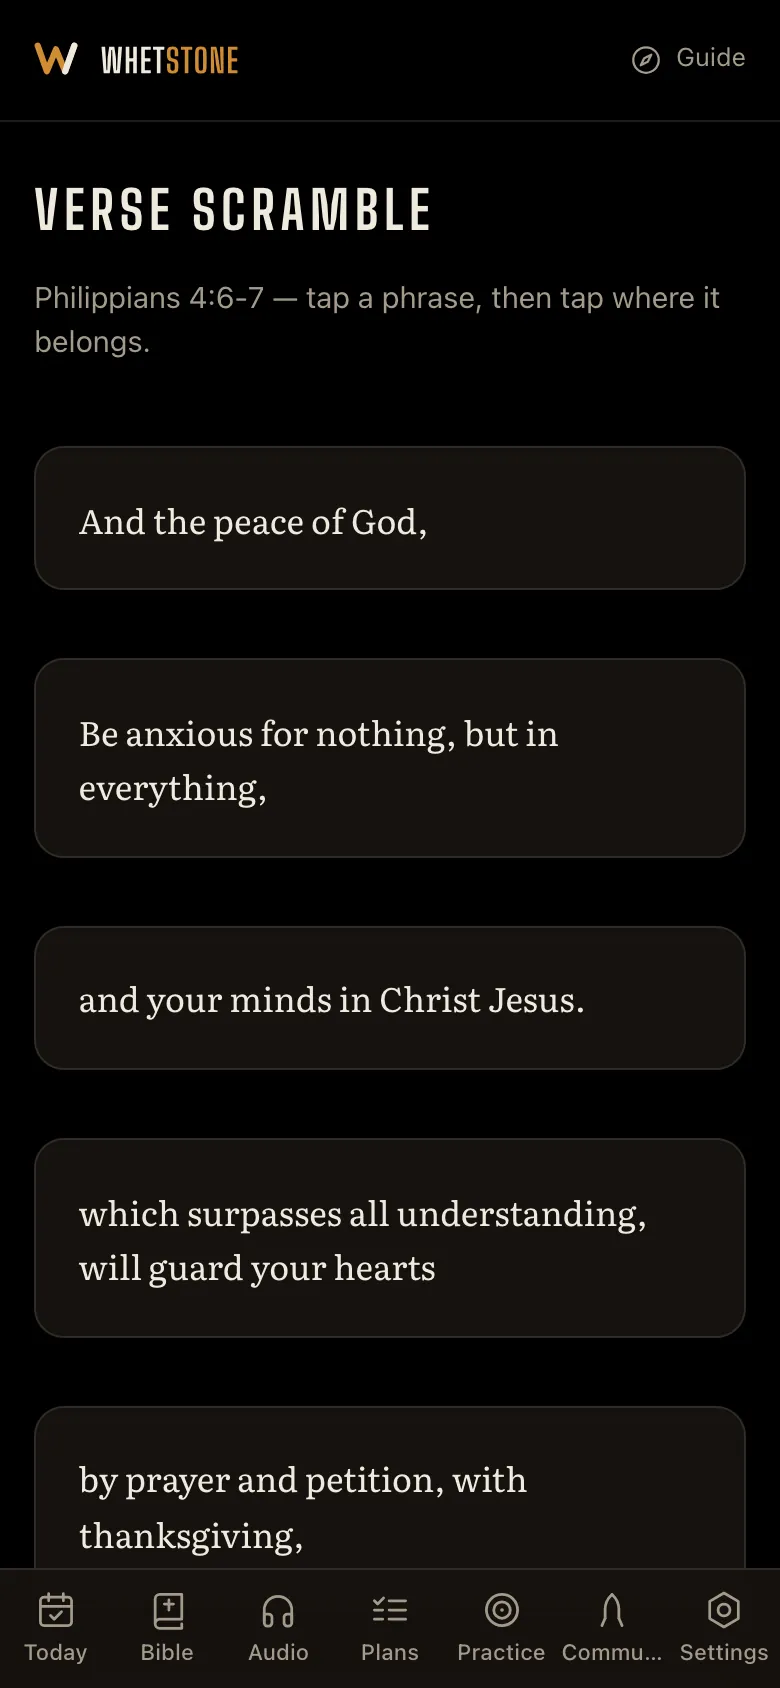
Find it in Practice, from the card on Today. A verse is split into phrases and shuffled. Tap a phrase, then tap where it goes. Check the order tells you how many are right counting from the start. You recall a verse from the beginning, so the first few matter most.
There’s no timer and nothing is recorded. Sword Drill is the scored one; this is for when you want practice without pressure. Verses with fewer than three phrases are left out, since there’s nothing to put in order.
6
Sword Drill.
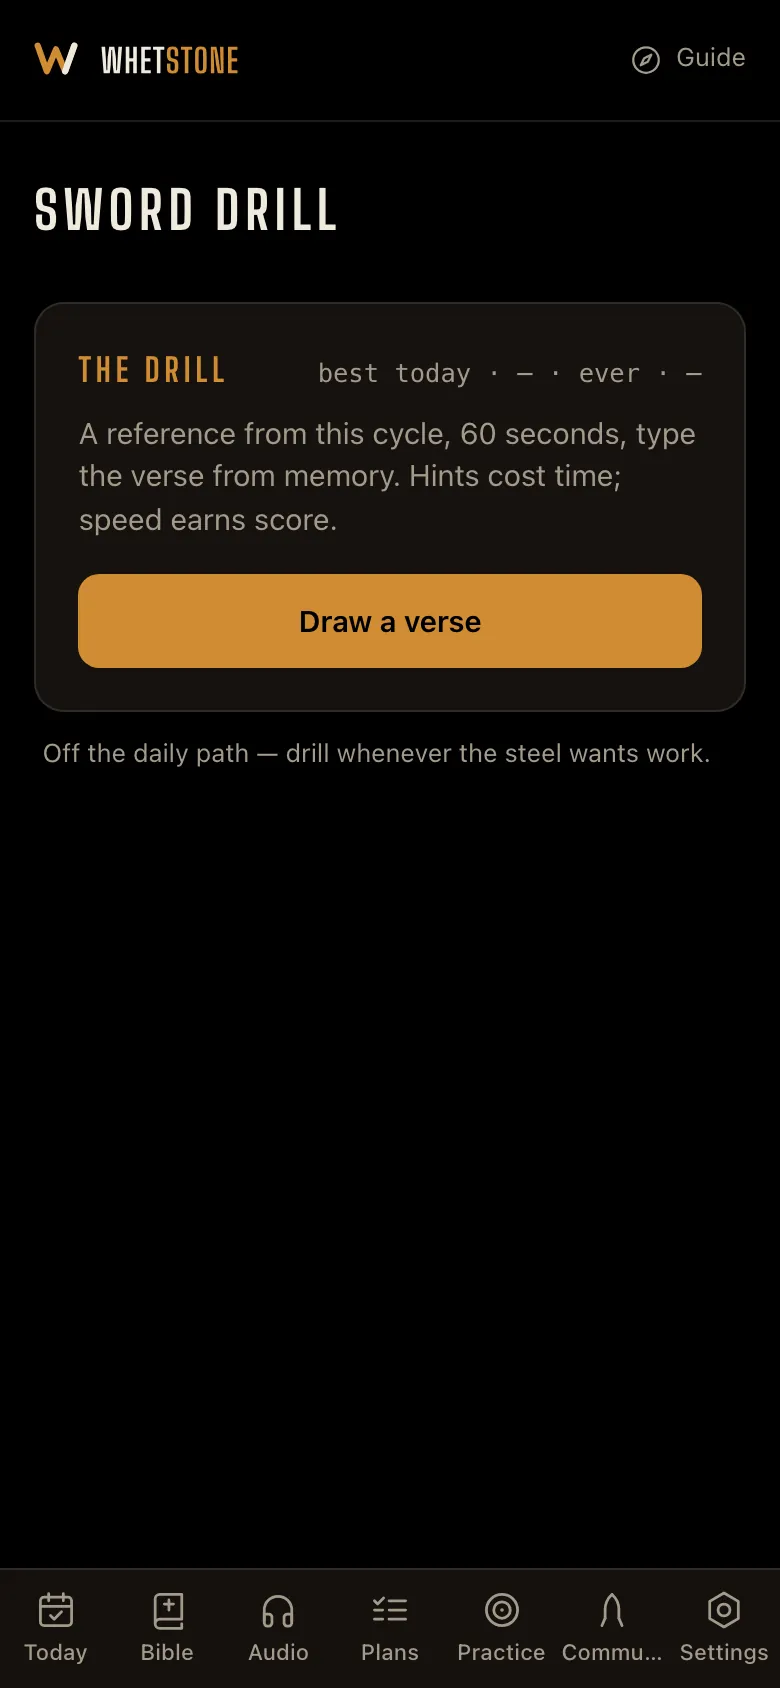
Find it in Practice, from the card on Today. You get a reference and 60 seconds to type the verse from memory. Hints appear as the clock runs down, but each one costs you. It’s extra practice, never required, and it keeps your best score for today and your best ever.
7
Your progress.
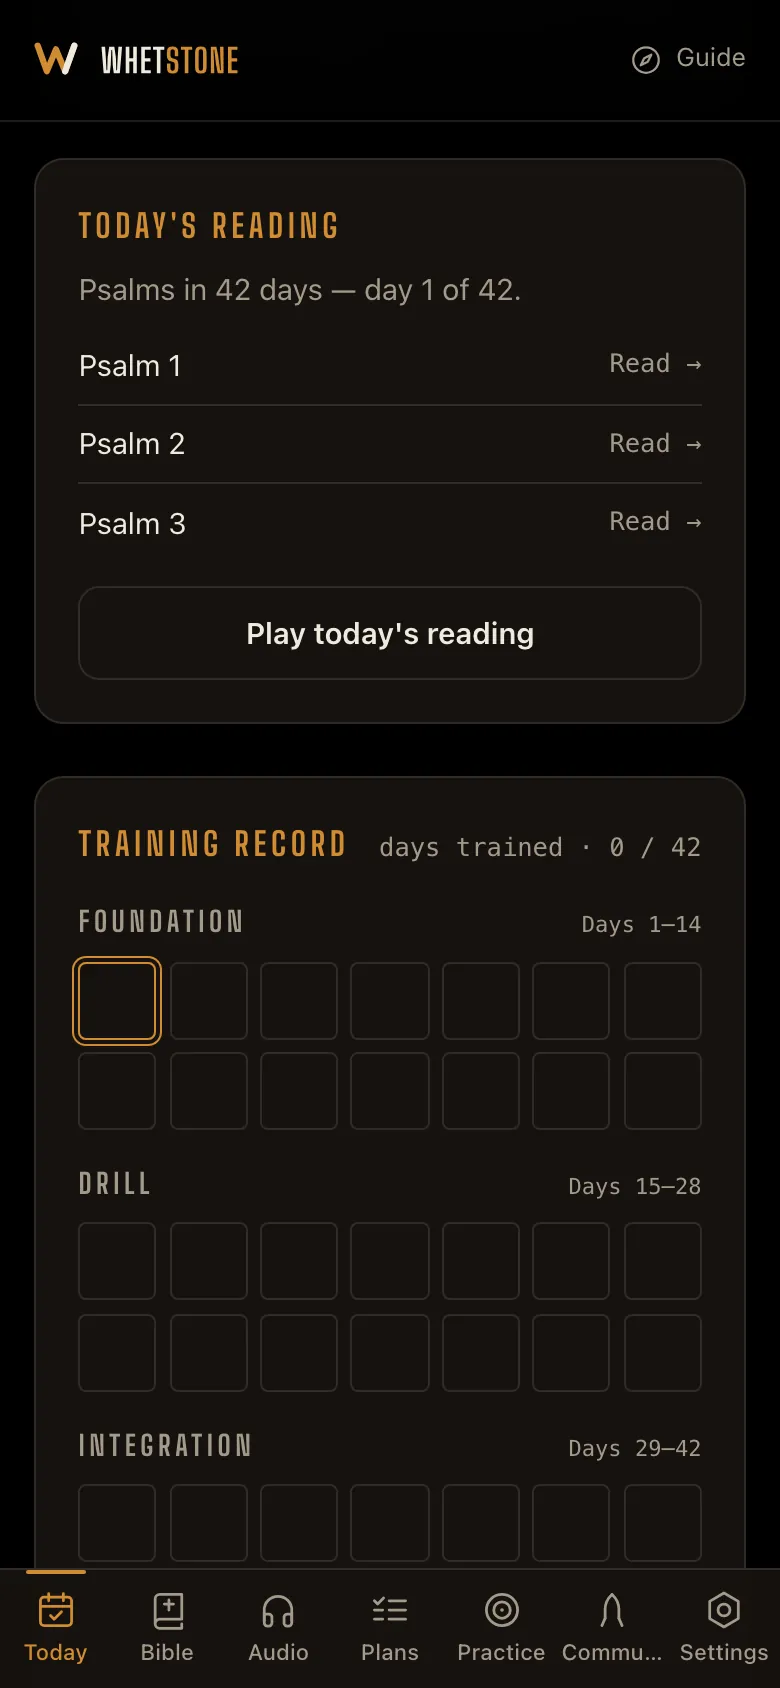
On Today, tap Cycle details at the bottom of the Daily Sharpening card to see your Training record. There’s one block per day and a count of days trained at the top. A missed day shows as a dim block, not a red one, and nothing ever resets. Finished cycles keep their records too.
8
Reading plans.
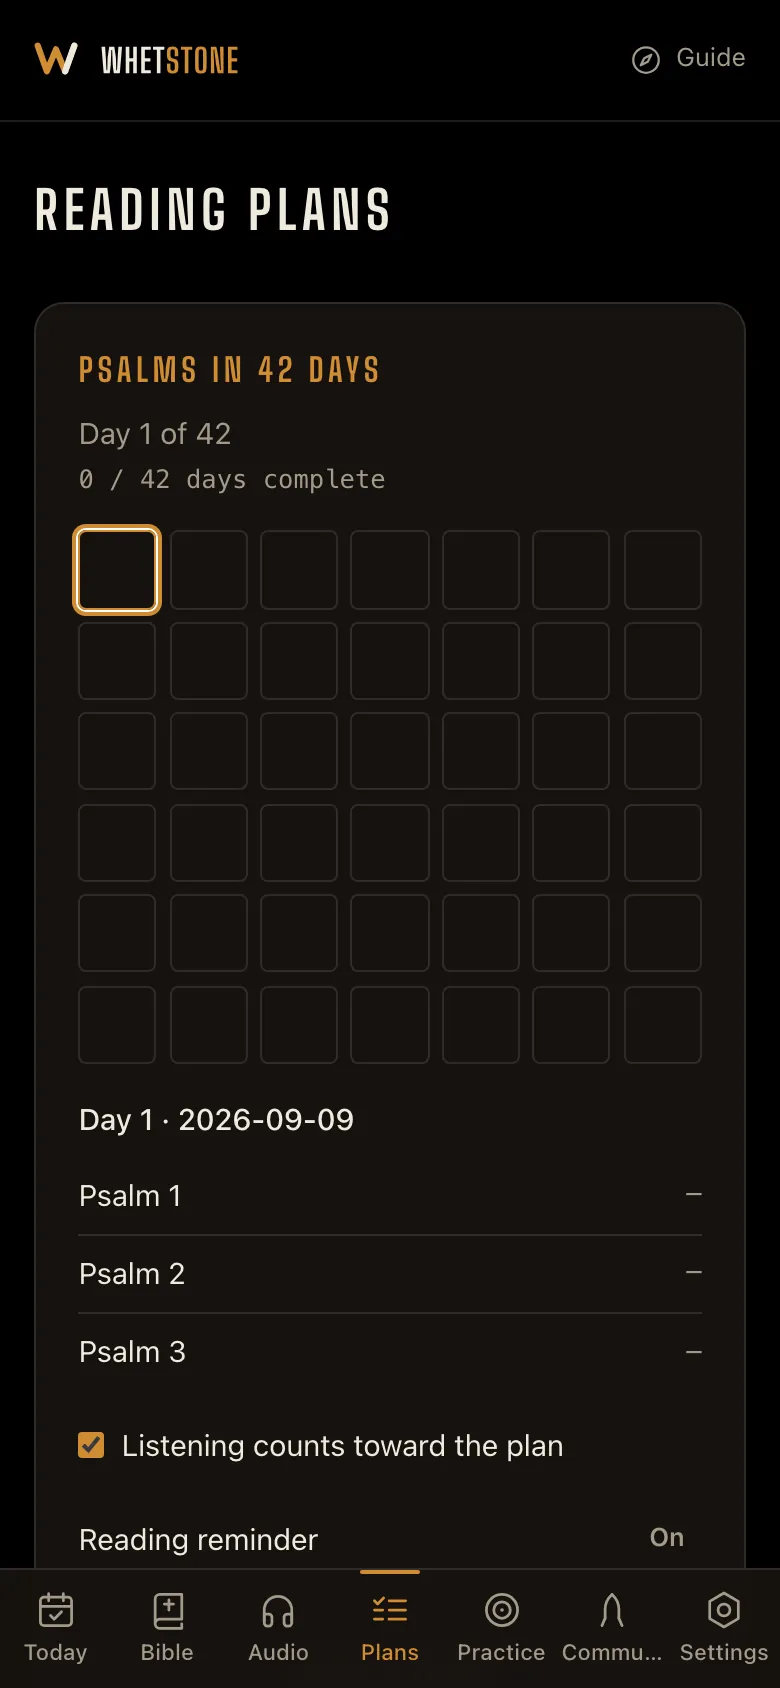
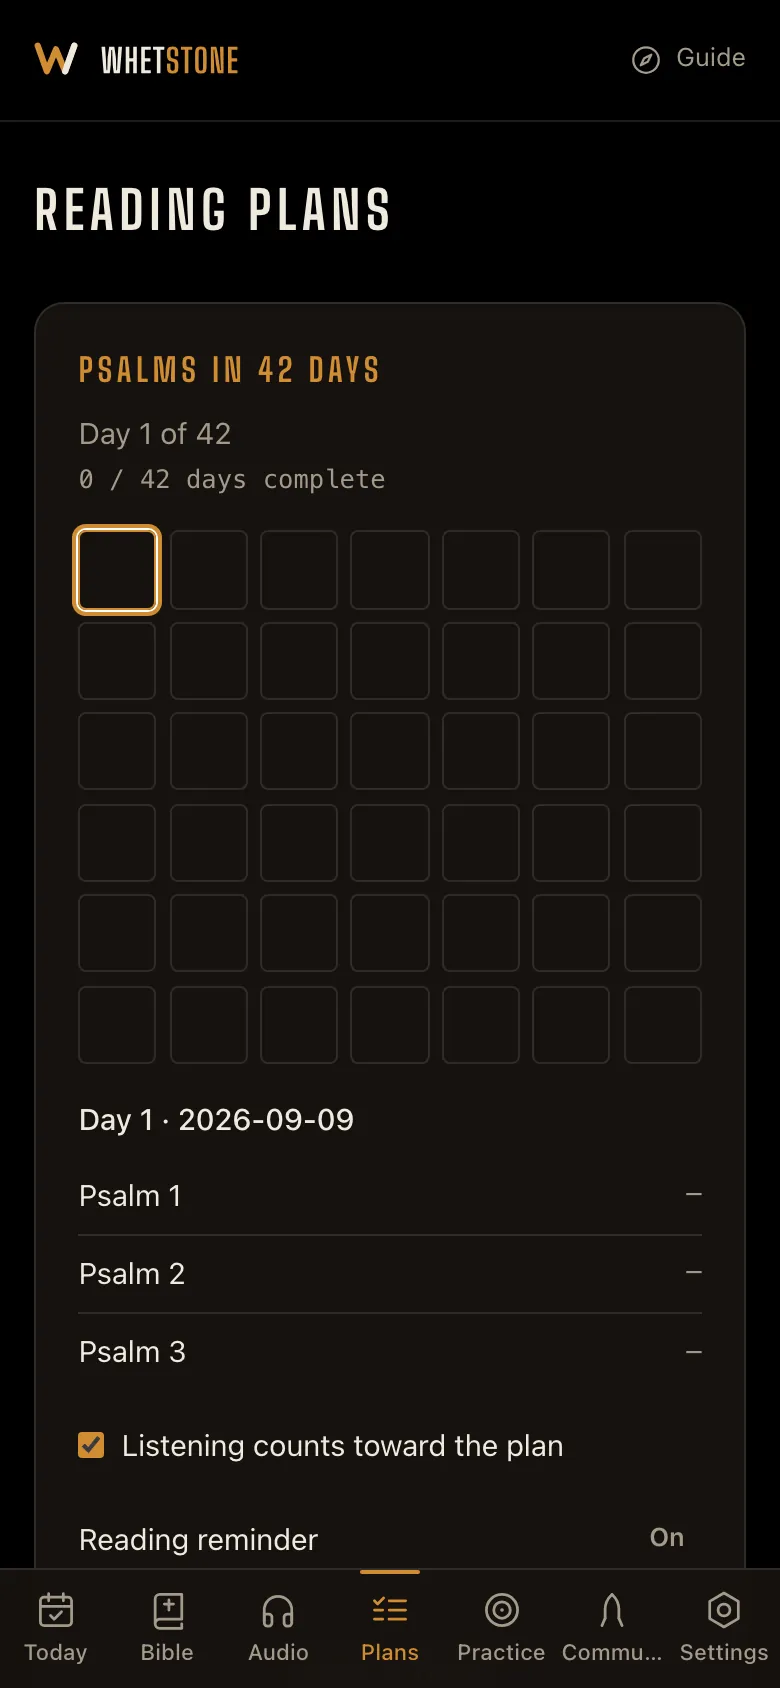
The Plans tab sorts plans into three tabs. Bible has 24, from Mark in 16 days to the whole Bible in a year. The Bible in chronological order reads every chapter once, in the order things happened. Psalms, prophets and letters are placed by the Bible’s own evidence (a psalm’s heading, the kings a prophet names, where a letter says it was written), checked against George Townsend’s chronological Bible from the 1820s. New Testament in a year, weekdays is one chapter each weekday, so with weekends off you finish in a year. Topics has 45 one-week plans on subjects like grace, anxiety, marriage and prayer. Each day is one whole chapter, the verses on the topic are underlined, and the reader opens at them when you start. Fits a cycle lists every plan that lasts exactly 42 days, the length of a Training Cycle: ten book plans (1 & 2 Samuel in 42 days, Paul’s Letters in 42 days, Genesis & Exodus in 42 days, Gospels & Acts in 42 days, Psalms in 42 days, Isaiah in 42 days, The Minor Prophets in 42 days, Wisdom books in 42 days, John’s writings in 42 days, and Acts and Romans in 42 days) and seven topic series, each six topics back to back. You can run more than one plan at a time. Starting another plan adds it, and your other plans keep going.
Each plan shows the day’s chapters first, with Start today’s reading above them. That opens the first chapter. The › arrow at the bottom of the reader marks it read and moves to the next chapter for the day, and the counter between the arrows shows where you are (for example, 1 of 3 today). On the last chapter the arrow changes to ✓ and takes you back to where you started, whether that was the Plans tab, Today or Daily Sharpening, with a short Day complete note. The Mark read · next button at the end of each chapter does the same thing. You can also open any chapter by tapping it, or mark one read yourself.
Plans that aren’t part of your Training Cycle also appear on Today under Daily Sharpening, with Start today’s reading and Play today’s reading. Play today’s reading (and Listen instead in Daily Sharpening) adds the day’s chapters to Your queue on the Audio tab. Each new day those chapters are swapped for the next day’s, and anything you added to the queue yourself stays put. Your progress grid is below the day’s chapters; tap any day to see its reading.
If you fall behind, the plan picks up where you left off and shows which day you’re on and your new finish date. Stay on the original schedule skips the missed days instead, so you finish on your original date. Days you partly finished are kept. Pause this plan stops it and saves your progress so you can restart it later. Delete this plan removes it completely.
Build your own plan opens a form: name the plan, pick the books, set how many reading days it has, and tick Add a Psalm and a Proverb to each reading day if you want that too.
Watch: Reading plans · 0:41 9
Invite a friend to a reading plan.
On any plan you’re reading, tap Invite a friend. The link includes the plan’s name, start date and schedule, so your friend starts on the same day and reads the same chapters as you. They don’t need an account, and each person’s progress stays on their own device.
10
A reading plan inside a Training Cycle.
When you start a cycle on the Reading only or Memory and reading track, setup asks you to choose a plan. Plans that fit a Training Cycle (42 days), including the seven topic series, are listed first. The one-week topics aren’t offered here, but you can run one alongside your cycle from the Plans tab. A longer plan keeps going after Day 42; it isn’t cut off when the cycle ends.
If you already have a plan running, setup lets you continue it or start a different one. Continue lines that plan up with your cycle’s start date so the reading stays in step. A different plan is added alongside the ones you have. Either way, Daily Sharpening uses the cycle’s own plan, even if you start other plans later.
11
Day 42: graduation, and ending early.
On Day 42, Today shows Open Graduation. It sums up your cycle: days trained, verses carried and checkpoint scores. Complete this cycle keeps everything and moves every verse onto the maintenance schedule. Any verse marked Still sharpening can be retaken with one tap. If you need to stop early, Abandon this cycle… is at the bottom of Today. It asks you twice before it does anything, and your record is kept.
Watch: Day 42: graduation · 1:01
Groups & prayer
Groups & prayer
1
Your prayer list.
Your prayer list has its own screen; open it from the Your prayers card on Today. Up to five requests show up in each day’s session, and they rotate so every request comes around again. Mark answered moves a request to the Answered list, which is worth rereading on hard days. It works without an account, a group or a connection.
The group Prayer Wall is different. It’s shared with everyone in your group, on the Community tab. You can add any request from the wall to your own list with one tap.
Watch: Your prayer list · 0:42 2
Your group.
Groups in Whetstone come in four kinds: church, family, class and friends. To join one, enter its invite code under Invite & Settings on the Community tab. You’ll get the group’s announcements, a shared prayer wall, a shared calendar (its events show on your Today screen, each with an optional reminder), the sermon library and the group’s podcast. You don’t need a group to use the rest of the app.
Each group has its own colour, shown in the switcher at the top of Community. The sermon library holds each sermon with the pastor’s notes and links to listen to the recording or watch on YouTube or the livestream. Bible references in the notes are links that open the passage in the reader. The newest sermon also appears under the tiles on the Community tab, and the group’s banner shows how many members it has.
What’s new, near the top of Today, lists the latest announcements, prayer requests and upcoming events from your groups. Tap one to go straight to it, and it drops off the list. An event you opened early comes back on the day it happens. On the Community tab, the Announcements and Prayer Wall tiles show how many are new to you, and the count clears when you open them. What you’ve opened is remembered on all your devices.
Watch: Join your church · 0:47 3
Get notified about new posts.
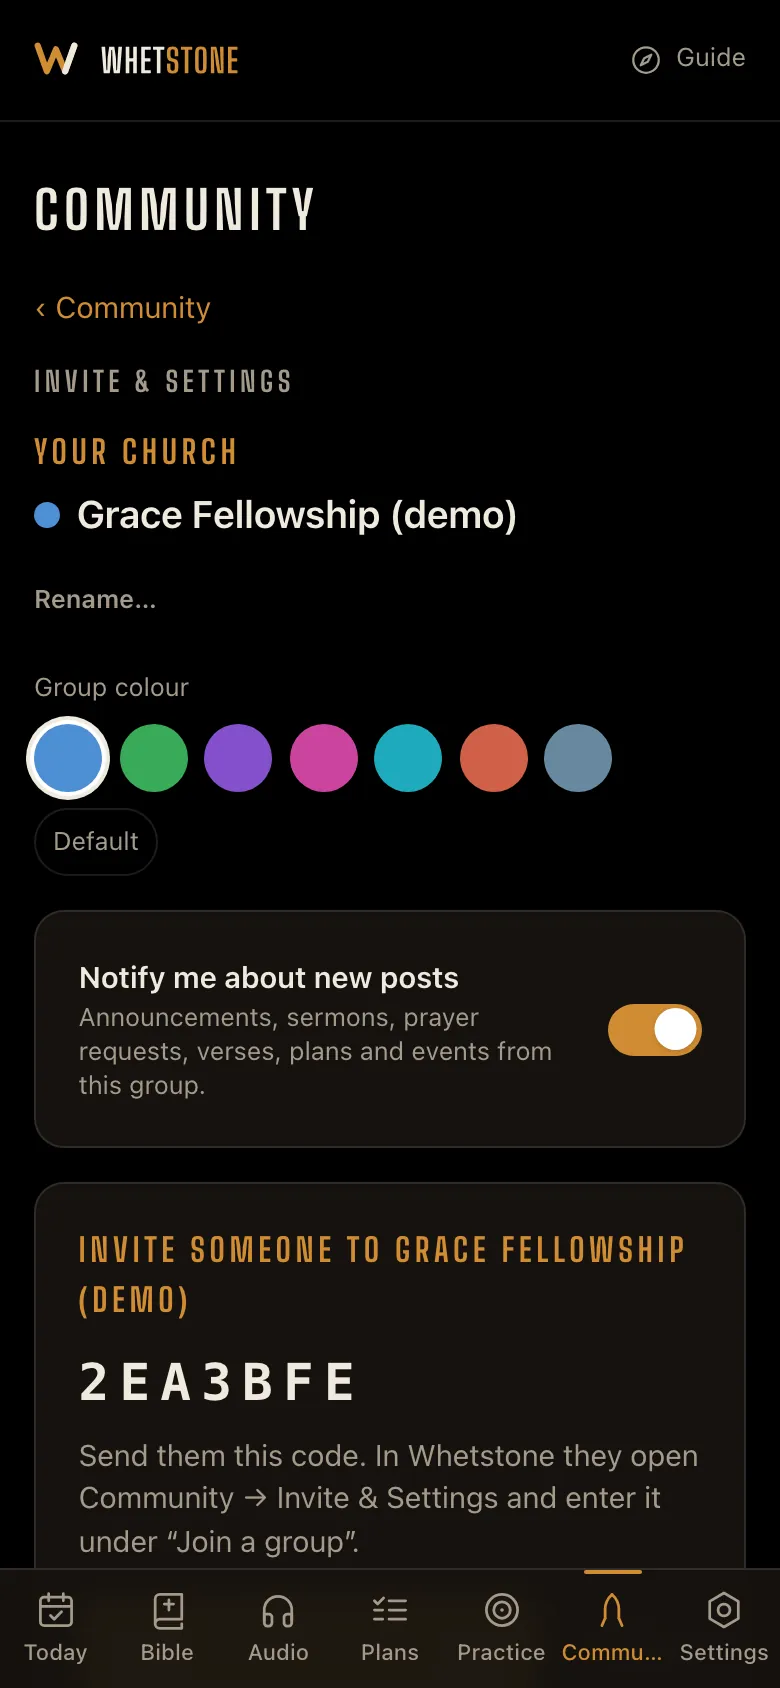
Whetstone can send you a notification when something new is posted to a group: an announcement, a sermon, a prayer request, a memory verse, a reading plan or a calendar event. Tapping the notification opens that post. Notify me about new posts is on by default, and you can turn it off for each group under Invite & Settings. It needs an account and notifications turned on for Whetstone on your phone.
4
Keeping the prayer wall safe.
On any post you didn’t write, the … menu has Report and Block. Report sends the post to the group’s admins, who get a notification and can delete the post or remove the member. Block hides everything that person posts, for you only. If an admin doesn’t act, use Send feedback in Settings to reach us directly; reports are handled within a day. A report that a group’s admins have not handled within a day is also reviewed by Whetstone, who can remove the post. Posts are also checked for slurs before they’re sent, and a post with blocked words can’t be submitted.
Watch: The prayer wall · 0:42 5
The group board.
The Board, on the Community tab, is where your group talks around the word. Post a reflection in your own words, or share a verse: in the reader, tap a verse number and choose Share to group, then add a note if you like. You can also share a note from a commentary: under any note in the commentary, tap Share to group, and the note goes to the board quoted exactly, with its source and the verse it is about. Posts show under the name you choose, and everyone in the group sees them.
Tap Amen to say one back to a post. On any post you didn’t write, tap Report… or Block…, just as on the prayer wall: a report goes to the group’s admins, and blocking hides that person’s posts for you only. With group notifications on, you hear about new posts; admins also hear about reports, see them in the Reported posts list at the top of the board, and can remove any post. A report that a group’s admins have not handled within a day is also reviewed by Whetstone, who can remove the post. The board needs an account and a group.

6
Acting on what your group shares.
When an admin shares a memory verse or starts a group reading plan, a From your group card shows up on Today. For a verse, tap Add to my cycle if you have a cycle running, or Save for my next cycle if you don’t. For a plan, Follow this plan starts it as your own plan, with the same start date so everyone reads the same chapters each day. Not now hides the card on that device only.
Watch: Share a memory verse · 0:35 7
Run your group.
Create a group on the Community tab and share the invite code; people can join in seconds. From Invite & Settings, admins can post announcements (give one a date and it goes on the calendar too), add calendar events, and build the sermon library: title, date, notes (bring in the text of your PowerPoint slides), a link to the recording and a YouTube or livestream link. Paste your podcast feed once and new episodes appear for everyone.
In the Memory verses section you can share or assign a verse, with an optional due date, and it shows up as a card on each member’s Today. In the Reading plan section you can start a plan from the catalog or build your own, and members follow it from Today the same way. Members, roles and the group’s colour are all managed from Invite & Settings.
Watch: Run your church's group · 0:51 8
Your church’s public page.
A church can have a public page that anyone can open, with no account. An admin sets it up in the Public page card, under Invite & Settings on the Community tab. It can include a short About section, service times, the address, a website, a livestream link, and switches to show the podcast and sermons. Members, the prayer wall and announcements never appear on it.
Choose who can see it. Every group starts as Private. Public page — link only gives you a link to share, but the page won’t show up in searches. Listed in Find a church adds you to the app’s church search by name, city or ZIP after a quick review, and the link works while you wait.
A sermon only shows on the page when the page’s Sermons switch is on and that sermon is marked Public (you’ll find the switch when you add or edit a sermon). Its outline only shows if you make that public too. Family, class and friends groups stay private.
Every public page has a Report link. If something on a page is wrong or offensive, report it. Reports come straight to us, and a page reported by several people is hidden until we review it.
Watch: Your church's public page · 0:59 9
Find a church.
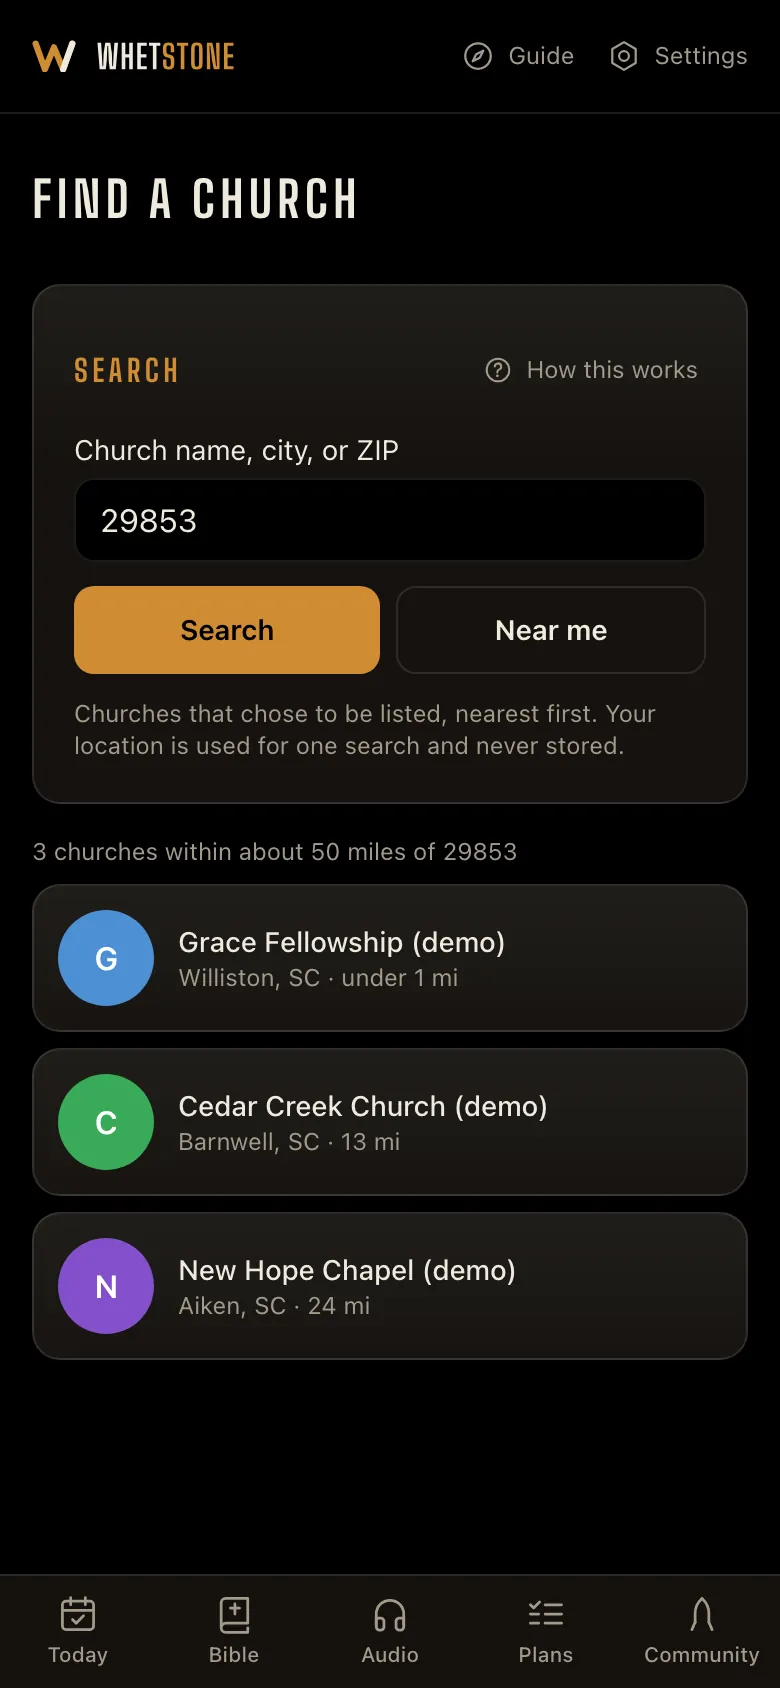
On the Community tab, Find a church searches churches that have chosen to be listed. Type a name, a city or a five-digit ZIP code. On the website you can also tap Near me; your location is used for that one search and isn’t saved. Tap a church to see its page, with service times, directions, sermons and podcast.
To join a church, ask for its invite code and enter it under Join a group, in Invite & Settings on the Community tab. Churches are checked before they’re listed, and no one can pay to appear higher. Results are sorted by distance, nearest first.
10
Belonging to more than one group.
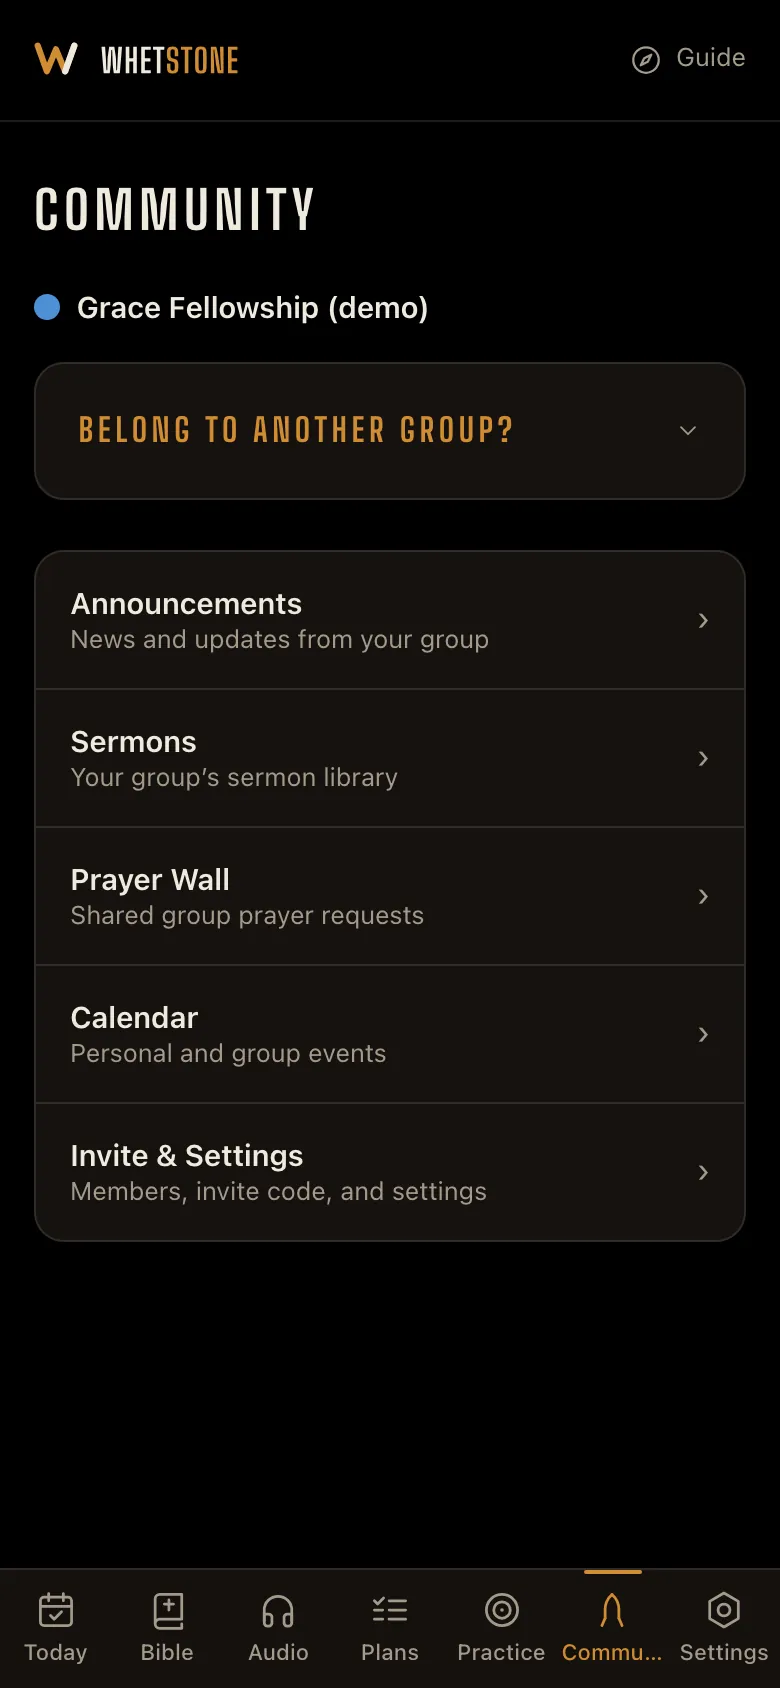
A group in Whetstone is any set of people you want to grow with: your church, your household, a Sunday school class or a few friends. Each group has its own announcements, calendar, prayer wall and invite code, and you can belong to as many as you like. If you’re in more than one, a row of buttons appears at the top of the Community tab; tap a name to switch. The group you looked at last is the one that opens next time on that device.
Each group has its own colour, which the admin sets under Invite & Settings. The colour shows in the switcher and on the active tile in that group.
11
Create a group, step by step.
Open the Community tab and go to Invite & Settings. Under Create a group, choose what kind of group it is (church, family, class or friends), give it a name, pick a colour and tap Create. You’re now its admin, and you’ll see a seven-character invite code. Send that code to the people you want to join. They go to the same Invite & Settings screen, type it under Join a group, and they’re in. The code is the only way in, so share it carefully: anyone who has it can read everything the group posts.
Watch: Create a group · 0:42 12
Add your podcast, step by step.
If your church already has a podcast, all you need is the feed address, so skip to the next paragraph. If it doesn’t, you’ll need to set one up first, because Whetstone plays your sermons but doesn’t store them. Sign up with a podcast host. Buzzsprout, Podbean, Libsyn, Spotify for Creators, Castos and Transistor are common choices, and most have a free or low-cost plan that’s plenty for a weekly sermon. Create the show and fill in its title, description, artwork and category before you publish, because the feed copies those details. Then upload your first sermon. The feed doesn’t exist until at least one episode is published.
Next, find the feed address. It’s a web address that usually ends in .rss, /rss or .xml. It is not the page people see on Apple Podcasts or Spotify. In Buzzsprout, it’s on the Directories page under the RSS Feed tab. In Libsyn, go to Destinations → Libsyn Classic Feed. In Spotify for Creators, sign in at creators.spotify.com, go to Settings → Availability and scroll to RSS Distribution. In Simplecast, it’s under the gear icon → Distribution. On other hosts, look for a section called Feed, Distribution or RSS, or ask your host’s support team. If your church website has a podcast page, the feed is often linked there with an orange RSS icon.
Before you switch on a Spotify feed, know two things. Turning it on makes the show’s email address public, since anyone with the feed link can see it, so use a church office address rather than a personal one. And if your sermons only exist inside Spotify, there’s no public feed to use; you’d need to publish through one of the other hosts first.
Once you’ve copied the address, open Community → Invite & Settings in Whetstone, paste it into the podcast feed box and save. Episodes appear for every member under Community → Sermons, newest first, and new ones show up on their own after that.
If nothing appears, you’ve most likely pasted the listing page instead of the feed. Open the address in a browser first. A feed shows a page of code rather than a normal web page, and that’s how you know it’s the right one.
Find your feed on your host
Each platform hides the URL in a different place. Here is where to look on the common ones.
Buzzsprout
- 1.Sign in at buzzsprout.com.
- 2.Click Directories in the left-hand menu.
- 3.Click the RSS Feed tab — your feed URL is listed there.
- 4.Copy the full URL (starts with https://feeds.buzzsprout.com/).
Podbean
- 1.Sign in at podbean.com.
- 2.Open your podcast and go to Settings.
- 3.Look for a section called RSS Feed or Distribution — your feed URL is listed there.[unverified]
- 4.Copy the full URL.
Libsyn
- 1.Sign in at libsyn.com.
- 2.Click Destinations in the left-hand menu.
- 3.Click Libsyn Classic Feed — your feed URL is shown there.
Spotify for Creators
- 1.Sign in at creators.spotify.com.
- 2.Click Settings (gear icon, top right).
- 3.Click Availability.
- 4.Scroll to RSS Distribution — your public feed URL is shown there.
- 5.Note: enabling this makes your show’s contact email public. Use a church address, not a personal one.
Castos
- 1.Sign in at castos.com.
- 2.Open your podcast.
- 3.Look for Distribution or RSS in the settings panel — your feed URL is listed there.[unverified]
- 4.Copy the full URL.
Transistor
- 1.Sign in at transistor.fm.
- 2.Open your show.
- 3.Look for Share or Distribution in the navigation — your RSS feed URL is shown there.[unverified]
- 4.Copy the full URL.
Simplecast
- 1.Sign in at simplecast.com.
- 2.Open your show.
- 3.Click the gear icon (Settings).
- 4.Click Distribution — your feed URL is shown there.
Apple Podcasts
- 1.The Apple Podcasts page for your show is a directory listing, not an RSS feed. Your feed URL is on your hosting platform (Buzzsprout, Libsyn, etc.) — not on Apple’s site.
YouTube
- 1.YouTube channels have no audio RSS feed, so a YouTube link cannot be used as a podcast feed. Publish your audio through a podcast hosting service (Buzzsprout, Podbean, etc.) first, then use that host’s feed URL.
Watch: Add your podcast · 0:35 13
Add a sermon, step by step.
Go to Community → Sermons and add a sermon. Give it a title and the date it was preached. Paste your notes into the notes box. Any Bible reference you type, like John 3:16 or Romans 8, becomes tappable for everyone reading it and opens that passage in the reader. You don’t need to do anything special; just type the references normally.
If you have slides, choose your PowerPoint file under Import from PowerPoint (from Google Slides or Keynote, download the deck as PowerPoint first). Whetstone reads the words on each slide and its speaker notes, and lists them with checkboxes. Untick any you don’t want, such as song lyrics, which are licensed and can’t be republished, then tap Insert selected to add the text to your notes. Only the text comes in; the slides themselves aren’t shown as pictures.
Paste a link to the sermon recording under Audio URL and members get a Listen button. Paste a YouTube or livestream link under Livestream URL and they get a Watch button. Tap Add sermon, and it’s in the library for the whole group.
Watch: Add a sermon · 1:07 14
Your private notes on a sermon.
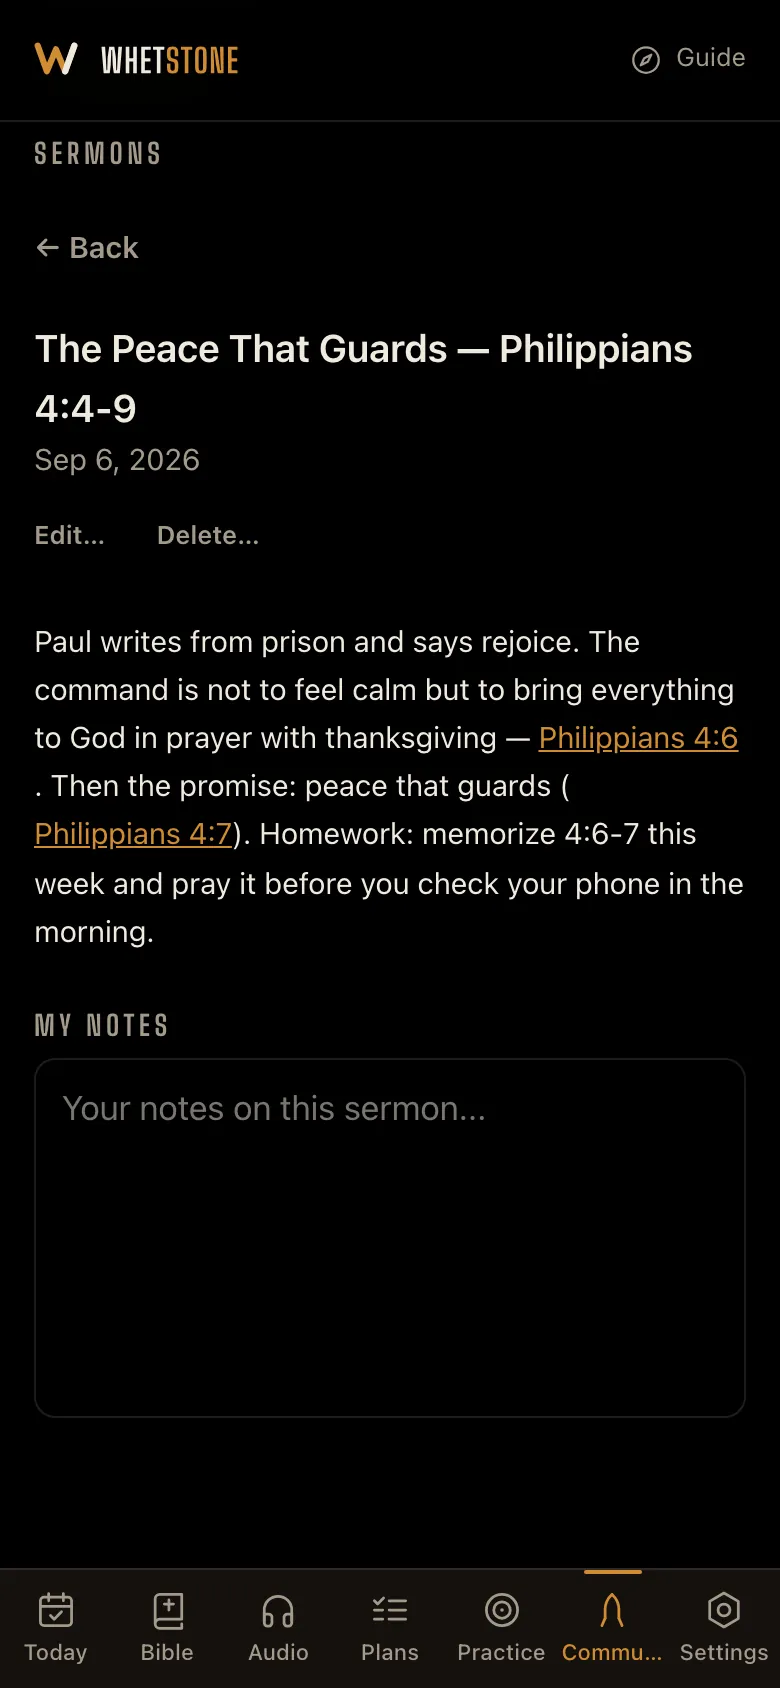
Open any sermon from the Community tab and scroll to My notes. Type your own notes; they save as you go. Only you can see them. They aren’t shared with the group, the admins or anyone else, and they sync across the devices you’re signed in on.
15
Events with sign-ups.
When you create a church event, you can turn on sign-ups. In the Sign-ups section of the event form, choose RSVP (Going, Maybe or Can’t) or Register (Going, with up to five questions). Sign-ups are off by default, so ordinary calendar events work as before. You can also add a flyer in the What section; it’s resized on your phone and shown at the top of the event page.
You can set a limit on how many can come. Once it’s full, anyone else who says Going joins a waitlist, and when someone cancels, the next person in line who fits is moved in automatically. You can let people bring guests (and ask for their names), set a deadline for sign-ups, and add questions as free text, yes/no or a list to pick from. That’s useful for things like dietary needs, shirt sizes or which session someone wants.
Save as draft while you’re working on it; only admins can see drafts. When it’s ready, choose Publish and invite the group. Everyone gets an invite card on their Today screen, and a notification if they have group notifications on. Nearer the day you can send one Final call, a single extra notification. If plans change, Cancel event marks it cancelled everywhere.
Members respond from the card on Today or from the event page, and can change or cancel their answer until the deadline. Anyone on the waitlist can see their place in line. Once someone answers, their invite card is replaced by a one-line reminder under Coming up. You choose who can see the attendee list: admins only, or everyone in the group, in which case members can see who’s going.
As the admin, open Roster from the event page to see who’s coming. Tap the counts at the top to filter by going, maybe, can’t, waitlist, not answered or checked in. There’s a search box, and each person’s guests, answers and note are listed. On the day, tap Check in next to a name, or switch to Check-in mode for a list with big buttons to use at the door. Export CSV gives you a spreadsheet of everyone. Message registrants sends a short note (up to 280 characters) to people going, people going plus the waitlist, or everyone who answered. It appears on their Today screen, and as a notification if they have group notifications on. Duplicate event copies everything except the responses to a new date as a draft, ready to publish.
Watch: Events and sign-ups · 1:02 16
Put something on the calendar, step by step.
Go to Community → Calendar → Add church event. It needs a title and a date. Everything else is optional: a description and a flyer, start and end times (or All day), a location and a map or meeting link, notes, a colour, and sign-ups (see Events with sign-ups). Choose Publish and invite the group and it appears on every member’s calendar, and on their Today screen as the date gets close. Or choose Save as draft to finish it later.
Event reminders are each member’s choice: anyone can turn one on for the events they care about. If an event takes sign-ups, the people who sign up are also reminded automatically, at the times you set under Reminders on the form, and they can turn that off in Settings → Reminders. If you want everyone to hear about something, tick Also post as announcement.
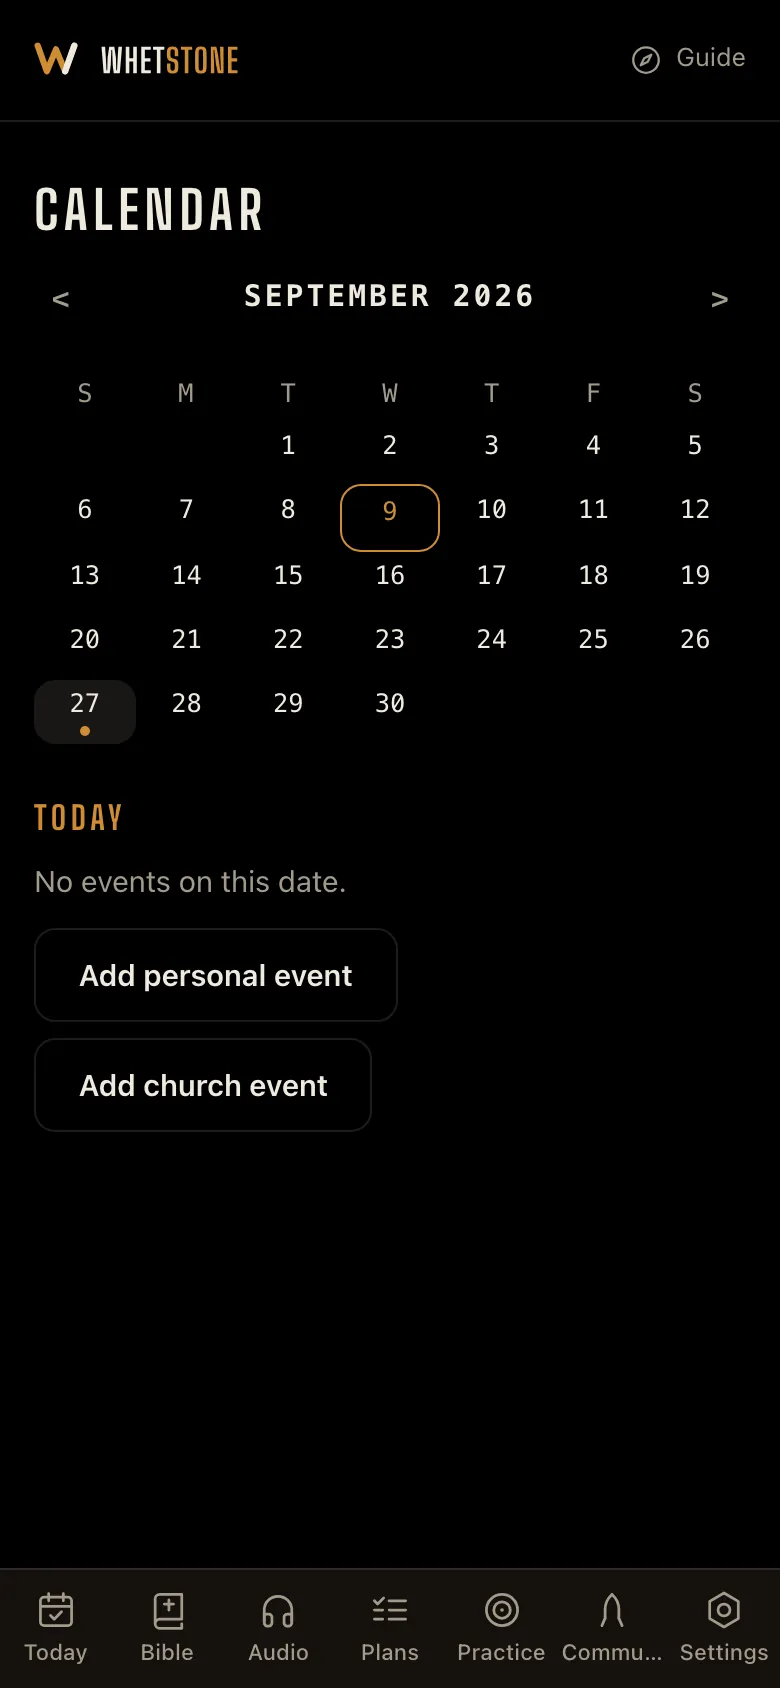
Three kinds of item show up on the calendar by themselves, without creating an event: announcements with a date (labelled “Announcement”), memory verses with a due date (labelled “Memory verse”), and the start date of a group reading plan (labelled “Reading plan”). Each one has an “Open in Community” link.
Account & data
Account & data
1
Your account, and how to delete it.
There’s no password. Settings → Account asks for your email and sends you a six-digit code. You don’t have to have an account; it’s for reminders, groups, and keeping your training in step across devices. Delete account is just below Sign out. It tells you exactly what will be deleted, and it can’t be undone.
Watch: Your account and data · 0:49 2
Never lose your work.
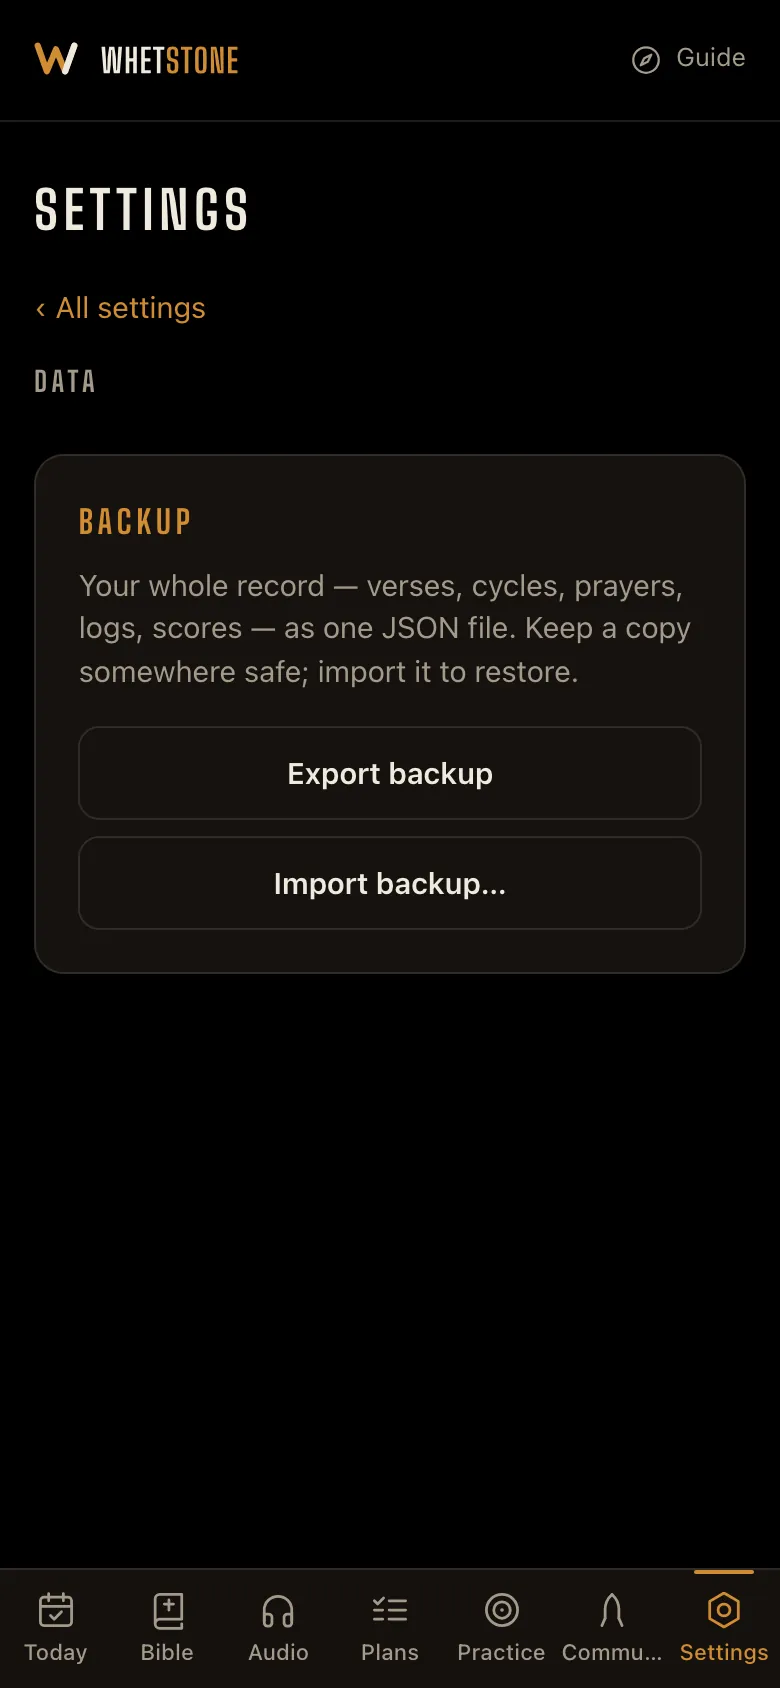
When you’re signed in, your account is your backup, so a new phone or a cleared browser won’t lose anything. If you’d also like your own copy, Settings → Data exports your whole record as one file and can import it back.
The method
Why it works
The 42-day cycle is shaped by learning research. These notes explain the reasoning behind the design.
Why a cycle is 42 days.
Lally et al. (2010) measured how long new habits took to become automatic. The median was 66 days, with a range of 18 to 254. A cycle is 42 days: short enough to finish, and long enough to build the habit well on its way.
That’s why the app never says you’re done at Day 42. What keeps memorized verses for good is the review schedule that comes after.
Missing one day costs you almost nothing.
The same study found that missing a single day had no real effect on forming a habit. It’s two misses in a row where things start to slip.
So there’s no streak to lose, and nothing resets because of one bad day. The first miss is simply forgiven; after a second, you get a shortened catch-up. The calendar keeps moving either way, and a cycle is still 42 days.
Tie it to something you already do.
The best predictor of a habit lasting is doing it in the same setting each time: the same time, the same place, after the same thing. Attach your session to something you already do every day. It matters more than motivation.
Learn a verse a phrase at a time.
Your working memory holds about four things at once. A 30-word verse isn’t one thing to memorize. It’s four or five phrases, learned in order and then put together.
Recalling beats rereading.
Testing yourself works much better than reading the verse again. It’s called the testing effect, and it’s one of the most repeated findings in learning research.
Rereading feels productive because it’s easy. Trying to recall feels harder, but it works better. That’s why the Drill phase hides the text.
Why first letters help.
Going straight from seeing the verse to seeing nothing is too big a jump. A first-letter prompt keeps the shape of the verse, its phrases and rhythm, while hiding the words. It’s the step between reading and recalling it cold.
Spacing is what makes it last.
Reviewing at longer and longer gaps (7 days, then 30, 90, 180 and 365) gives you a much more lasting memory than spending the same time cramming. Graduated verses come back on that schedule.
A couple of minutes of review a day protects months of work.
Say it out loud.
Speaking a verse uses both your voice and your hearing, and it shows up the places where you think you know it but don’t. That’s why reading aloud is part of the Foundation phase.
Typos don’t count against you.
Whetstone accepts a close misspelling as correct. You’re memorizing Scripture, not practicing spelling. What matters is whether the word came from memory.
It’s fine to skip.
Every recall activity has a skip button. Use it on days you really can’t do it. The day still counts toward your routine, but you don’t get credit for work you didn’t do.
Skipped verses never count toward mastery, and they come back the next day.
What happens exactly depends on where you are. In a daily session, the day still counts but that verse misses its practice. At a checkpoint, the verse is marked untested, which means extra practice through Week 4 or graduating as still sharpening. In maintenance, nothing changes and it comes back the next day. In a Sword Drill round, nothing is recorded.